How to Reset the Check Engine Light on a 2019 F150
The 2019 f150 check engine light reset process is simple and can save you time and money. Whether the light came on due to a loose gas cap, a faulty sensor, or a deeper engine issue, you can clear the warning with the right tools and a bit of patience. This guide walks you through every method, from using an OBD-II scanner to disconnecting the battery, so you know exactly what to do.
That little yellow engine icon on your dashboard can send a wave of panic through any truck owner. If you own a 2019 F150, you are not alone. The check engine light is one of the most common dashboard alerts drivers face. But here is the good news. Resetting it is often easier than you think.
In this guide, we will walk you through every method to perform a 2019 F150 check engine light reset. We will cover OBD-II scanners, battery disconnects, fuse pulls, and more. You will also learn what causes the light to come on in the first place. By the end, you will feel confident handling this issue yourself.
The check engine warning is your truck’s way of telling you something needs attention. Sometimes it is a minor issue like a loose fuel cap. Other times, it signals a more serious problem with the oxygen sensor, catalytic converter, or mass airflow sensor. Either way, understanding the root cause is the first step. Once you know what triggered the light, you can fix it and clear the code with confidence.
Key Takeaways
- Multiple reset methods work: You can use an OBD-II scanner, disconnect the battery, or remove the fuse to reset the light.
- Fix the root cause first: Simply resetting without addressing the problem will cause the light to return quickly.
- An OBD-II scanner is the best tool: It reads fault codes and helps you understand what triggered the warning.
- A loose gas cap is a common culprit: This simple fix often resolves the issue without any tools.
- Resetting won’t clear physical damage: If a part is failing, it needs repair or replacement.
📑 Table of Contents
- Why Does the Check Engine Light Come On?
- Tools You Will Need for a 2019 F150 Check Engine Light Reset
- Method 1: Reset Using an OBD-II Scanner
- Method 2: Disconnect the Battery
- Method 3: Pull the Fuse
- Comparison of Reset Methods
- What to Do After Resetting the Light
- Common Mistakes to Avoid
- When to See a Professional
- How to Prevent the Check Engine Light from Returning
- Final Thoughts
Why Does the Check Engine Light Come On?
Before you jump into the reset process, it helps to understand why the light appeared. The engine control module (ECM) monitors dozens of sensors in your 2019 Ford F150. When a sensor reads outside its normal range, the ECM stores a diagnostic trouble code (DTC). This code triggers the check engine warning on your dashboard.
Common Causes of the Engine Light
Several issues can activate the engine light on a 2019 F150. Here are the most frequent ones:
- Loose or damaged gas cap: A loose cap lets fuel vapors escape, which triggers the EVAP system code.
- Faulty oxygen sensor: This sensor measures exhaust gases. When it fails, fuel efficiency drops.
- Catalytic converter issues: A failing converter affects emissions and engine performance.
- Bad mass airflow sensor: This part measures the air entering the engine. Dirt or damage can throw off readings.
- Worn spark plugs or ignition coils: Misfires from old spark plugs are a very common trigger.
- Vacuum leaks: Cracked hoses can cause air leaks that confuse the ECM.
Knowing the cause helps you decide whether a simple reset is enough or if you need a repair. If you just reset the light without fixing the problem, it will almost certainly come back.
Tools You Will Need for a 2019 F150 Check Engine Light Reset
Gathering the right tools before you start makes the process smooth. Here is what you will need for a 2019 F150 check engine light reset:
- OBD-II scanner: This is the most important tool. It connects to the diagnostic port and reads fault codes. You can buy one for under $30 at most auto parts stores.
- Basic hand tools: A wrench or socket set helps if you need to access the battery or fuse box.
- Clean rag or cloth: Useful for cleaning the battery terminals before reconnecting.
- Replacement parts: If your inspection reveals a faulty component, have the part ready before you reset.
A quality OBD-II scanner is worth every penny. It not only clears codes but also helps you understand what is going on with your engine. Some scanners even offer live data streams, which let you watch sensor readings in real time.
Method 1: Reset Using an OBD-II Scanner
This is the most reliable and recommended way to perform a 2019 F150 check engine light reset. It gives you full control over the process and lets you read the stored codes first.
Step-by-Step Instructions
- Locate the OBD-II port: On the 2019 F150, the port is under the dashboard on the driver side. It is near the steering column and easy to reach.
- Plug in the scanner: Connect the OBD-II scanner firmly into the port. The connector clicks into place.
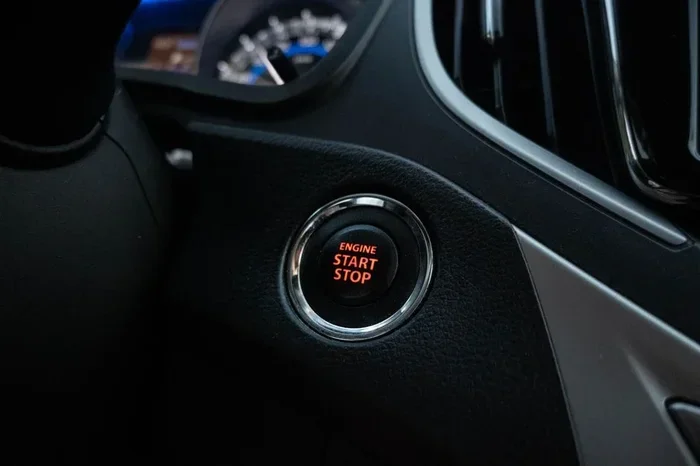
- Turn the ignition to ON: Do not start the engine. Just turn the key to the ON position or press the start button without pressing the brake.
- Read the fault codes: The scanner will display any stored diagnostic trouble codes. Write these down or take a photo with your phone.
- Look up the codes: Use the scanner’s built-in database or search the codes online. This tells you what each code means.
- Fix the issue: Address whatever problem the codes reveal. Replace a loose gas cap, swap out a spark plug, or repair a vacuum leak.
- Clear the codes: Once the fix is in place, use the scanner to erase the stored codes. The check engine light should turn off.
- Test drive: Take the truck for a short drive. If the light does not return, the reset was successful.
Using an OBD-II scanner is the smartest first step. It tells you exactly what went wrong, so you do not guess. This approach also prevents you from clearing codes that point to a serious issue you might overlook.
Method 2: Disconnect the Battery
If you do not have a scanner, you can reset the light by disconnecting the battery. This method works by clearing the ECM’s memory. However, it also erases other settings like radio presets and clock data.
How to Disconnect the Battery
- Turn off the engine: Make sure the truck is completely off and the keys are removed from the ignition.
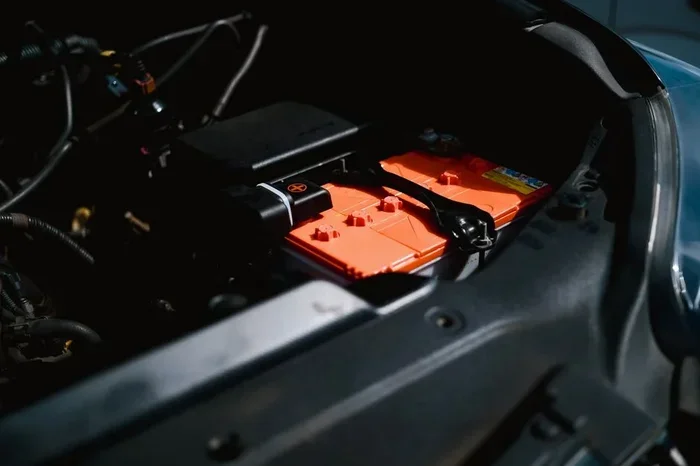
- Open the hood: Locate the battery on the driver side of the engine bay.
- Disconnect the negative terminal first: Use a wrench to loosen the nut on the black cable. Slide the cable off the terminal and tuck it away from the battery.
- Wait 15 to 30 minutes: This gives the ECM enough time to fully discharge and clear stored codes.
- Reconnect the negative terminal: Place the cable back on the terminal and tighten the nut securely.
- Start the engine: The check engine light should be off after the truck starts.
Quick Tip: Always disconnect the negative terminal first. This prevents short circuits and protects the truck’s electrical system. Reconnect it last when you are done.
Keep in mind that disconnecting the battery is a temporary fix. If the underlying problem is not resolved, the light will return within a few drive cycles. Use this method only when you already know the cause and have fixed it.
Method 3: Pull the Fuse
Another way to reset the check engine light is by pulling the appropriate fuse. This method is less common but works when you do not have a scanner or cannot access the battery easily.
Finding the Right Fuse
The 2019 F150 has multiple fuse boxes. The engine fuse box is located in the engine bay, while the interior fuse box is under the dashboard on the driver side. Check your owner’s manual to find the fuse that controls the ECM or the instrument cluster.
Once you locate the correct fuse, use a fuse puller or a pair of needle-nose pliers to remove it. Wait about 10 minutes, then reinsert the fuse. Start the engine and check if the light is off.
Common Mistake: Pulling the wrong fuse can disable other systems. Always double-check the fuse box diagram in the owner’s manual before removing anything.
Comparison of Reset Methods
| Method | Pros | Cons |
|---|---|---|
| OBD-II Scanner | Reads codes first, most accurate, preserves other settings | Requires purchasing a scanner |
| Battery Disconnect | No tools needed beyond a wrench, easy to do | Clears radio presets and clock, temporary fix only |
| Fuse Pull | No scanner required, quick | Risk of pulling wrong fuse, may not clear all codes |
For most people, the OBD-II scanner method is the best choice. It gives you information and control. The battery disconnect works well as a backup, and the fuse pull is a last resort.
What to Do After Resetting the Light
Resetting the light is only half the battle. After you complete the 2019 F150 check engine light reset, follow these steps to make sure the problem is truly resolved:
- Take a test drive: Drive the truck for at least 20 to 30 minutes. The ECM runs through several drive cycles during this time.
- Watch the dashboard: If the engine light stays off, your fix worked. If it returns, you need to investigate further.
- Rescan with the OBD-II tool: Plug the scanner back in and check if any codes returned. New codes will point you toward the real issue.
- Monitor fuel economy: A sudden drop in MPG can indicate an unresolved engine problem.
- Schedule a professional inspection: If the light keeps coming back, take the truck to a certified Ford mechanic. They have advanced diagnostic tools that can pinpoint hidden issues.
Expert Insight: Many drivers make the mistake of resetting the light and ignoring it. The light is a warning system for a reason. Even if the truck seems to run fine, a persistent code can lead to expensive repairs down the road. Always investigate the cause before clearing the codes.
Common Mistakes to Avoid
When dealing with the check engine light, certain mistakes can cause more harm than good. Here are the most common ones:
- Resetting without diagnosing: Clearing codes without knowing the cause is like treating a symptom instead of the disease. The light will return.
- Ignoring the light: A steady light is a warning. A flashing light means a serious problem, like a misfire that can damage the catalytic converter. Never ignore a flashing engine light.
- Using cheap scanner tools: Budget scanners may not read all codes or provide live data. Invest in a reliable OBD-II scanner that supports Ford-specific protocols.
- Disconnecting the battery while the engine is running: This can damage the ECM and other electronic components. Always turn the engine off first.
- Replacing parts without checking codes: Buying parts blindly based on a guess can waste money. Let the scanner codes guide your repairs.
When to See a Professional
Some check engine light issues are beyond DIY fixes. You should see a professional if:
- The engine light is flashing, which often indicates a severe misfire.
- The truck shows other symptoms like rough idling, stalling, or loss of power.
- You have reset the light multiple times and it keeps returning.
- The fault codes point to the catalytic converter or internal engine components.
- You are not comfortable working under the hood or using diagnostic tools.
A certified Ford technician has access to factory-level diagnostic equipment. They can read manufacturer-specific codes that generic scanners may miss. If the repair estimate seems high, always get a second opinion. But when it comes to complex engine issues, professional help is the safest choice.
How to Prevent the Check Engine Light from Returning
Once you have successfully performed a 2019 F150 check engine light reset, you want to keep it off. Here are some simple habits that help:
- Check the gas cap regularly: Make sure it clicks tightly after every fill-up. A loose cap is the number one cause of a false engine light.
- Keep up with scheduled maintenance: Regular oil changes, spark plug replacements, and air filter changes keep the engine running smoothly.
- Use quality fuel: Low-quality or contaminated fuel can trigger sensor codes and affect engine performance.
- Address small issues early: A minor vacuum leak or worn sensor will not fix itself. Catching small problems early saves you from costly repairs later.
- Monitor dashboard alerts: Do not ignore other warnings on the dashboard. Temperature gauges, oil pressure lights, and battery alerts all work together to protect your engine.
Key Takeaway: Prevention is always better than cure. A little regular maintenance goes a long way toward keeping the check engine warning off your dashboard and your 2019 F150 running strong.
Final Thoughts
Resetting the check engine light on your 2019 F150 does not have to be stressful. Whether you use an OBD-II scanner, disconnect the battery, or pull a fuse, the process is straightforward. The real key is finding and fixing the root cause of the warning. A successful 2019 F150 check engine light reset starts with understanding what triggered the light in the first place.
Start with the simplest fixes. A tightened gas cap or a new spark plug might be all you need. If the problem is more complex, use the fault codes from your scanner to guide your repair. And when in doubt, trust a professional mechanic to diagnose and fix the issue.
Your 2019 Ford F150 is a powerful and reliable truck. With the right knowledge and a few basic tools, you can handle the check engine light like a pro. Take action today, clear the warning, and get back on the road with confidence.
Frequently Asked Questions
Can I drive my 2019 F150 with the check engine light on?
If the light is steady and the truck runs normally, you can usually drive a short distance. However, a steady light means something needs attention. Avoid long trips and get the issue diagnosed as soon as possible to prevent further damage.
How much does it cost to reset the check engine light on a 2019 F150?
Resetting the light itself costs nothing if you use an OBD-II scanner, which you can buy for under $30. If you visit a mechanic or auto parts store, many will read and clear codes for free or for a small fee of around $20 to $50.
Will disconnecting the battery erase my radio presets on a 2019 F150?
Yes, disconnecting the battery will reset the radio presets, clock, and sometimes the power windows. You will need to reprogram these settings after reconnecting the battery. Always keep your radio codes handy before disconnecting.
What is the difference between a steady and flashing check engine light?
A steady light indicates a non-emergency issue that needs attention soon. A flashing light signals a serious problem, often a misfire that can damage the catalytic converter. If your light is flashing, reduce speed and visit a mechanic immediately.
How long does it take to reset the check engine light on a 2019 F150?
The reset process itself takes only a few minutes. Using an OBD-II scanner to clear codes takes about 2 to 3 minutes. The battery disconnect method requires waiting 15 to 30 minutes for the ECM to fully reset. The total time depends on the method you choose and whether you need to fix an underlying issue first.
What should I do if the check engine light comes back after resetting?
If the light returns, the underlying problem was not fully fixed. Rescan the truck with your OBD-II tool to see which codes came back. Focus on addressing those specific issues. If you cannot resolve the codes yourself, take the truck to a professional mechanic for a thorough inspection.